TexturePacker – A Fast and Easy Utility to Create Spritesheets
I’ve been using TexturePacker to do all the sprite sheets for my iOS games and so far I have been impressed. Simply drag and drop your png files to the app and that’s it. There are plenty of advanced options if you want to get fancy, such as:
– Trimming (remove whitespace on individual sprites – very handy!)
– Rotation (to help fit your sprites even tighter)
– Encryption (protect your art)
– Color Reduction (dithering, 16 bit conversion, etc.)
– Import PSD, PNG, JPG, SWF, TGA, BMP, TIFF
– Export to PNG, JPG, PVR (iPhone native format), PVR.CCZ (Cocos2d), PVR.gz (PVR gzipped) and KTX
– Runs on MAC, Linux and Windows!
– Exports metadata for just about any format you need (Cocos2d, Corona, Sparrow, LibGDX, LimeJS, Ogre, Moai, CSS, JSON or make your own)
Still not sure? Here’s how to make a sprite sheet with texture packer (MAC version) in about 30 seconds:
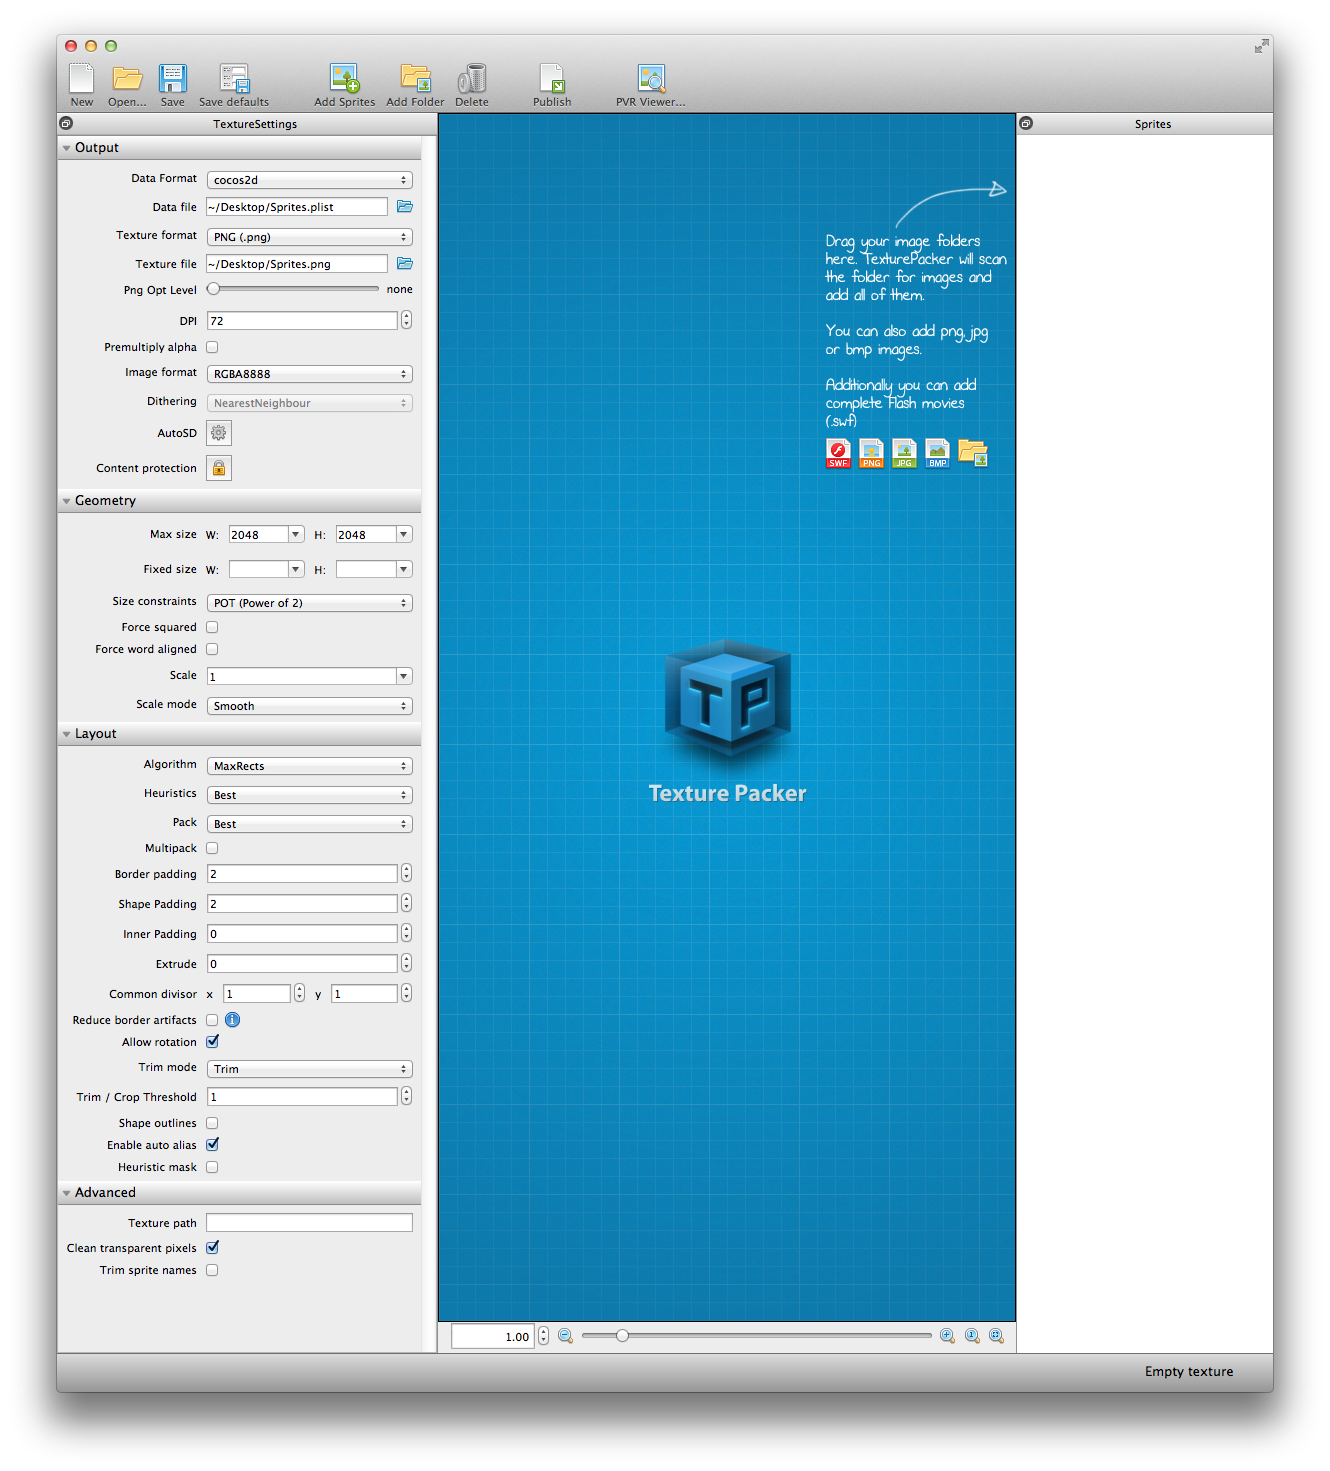
Step #1- Start texture packer and quickly enter the data file and image file (top left). In this example, I’m saving to my desktop.
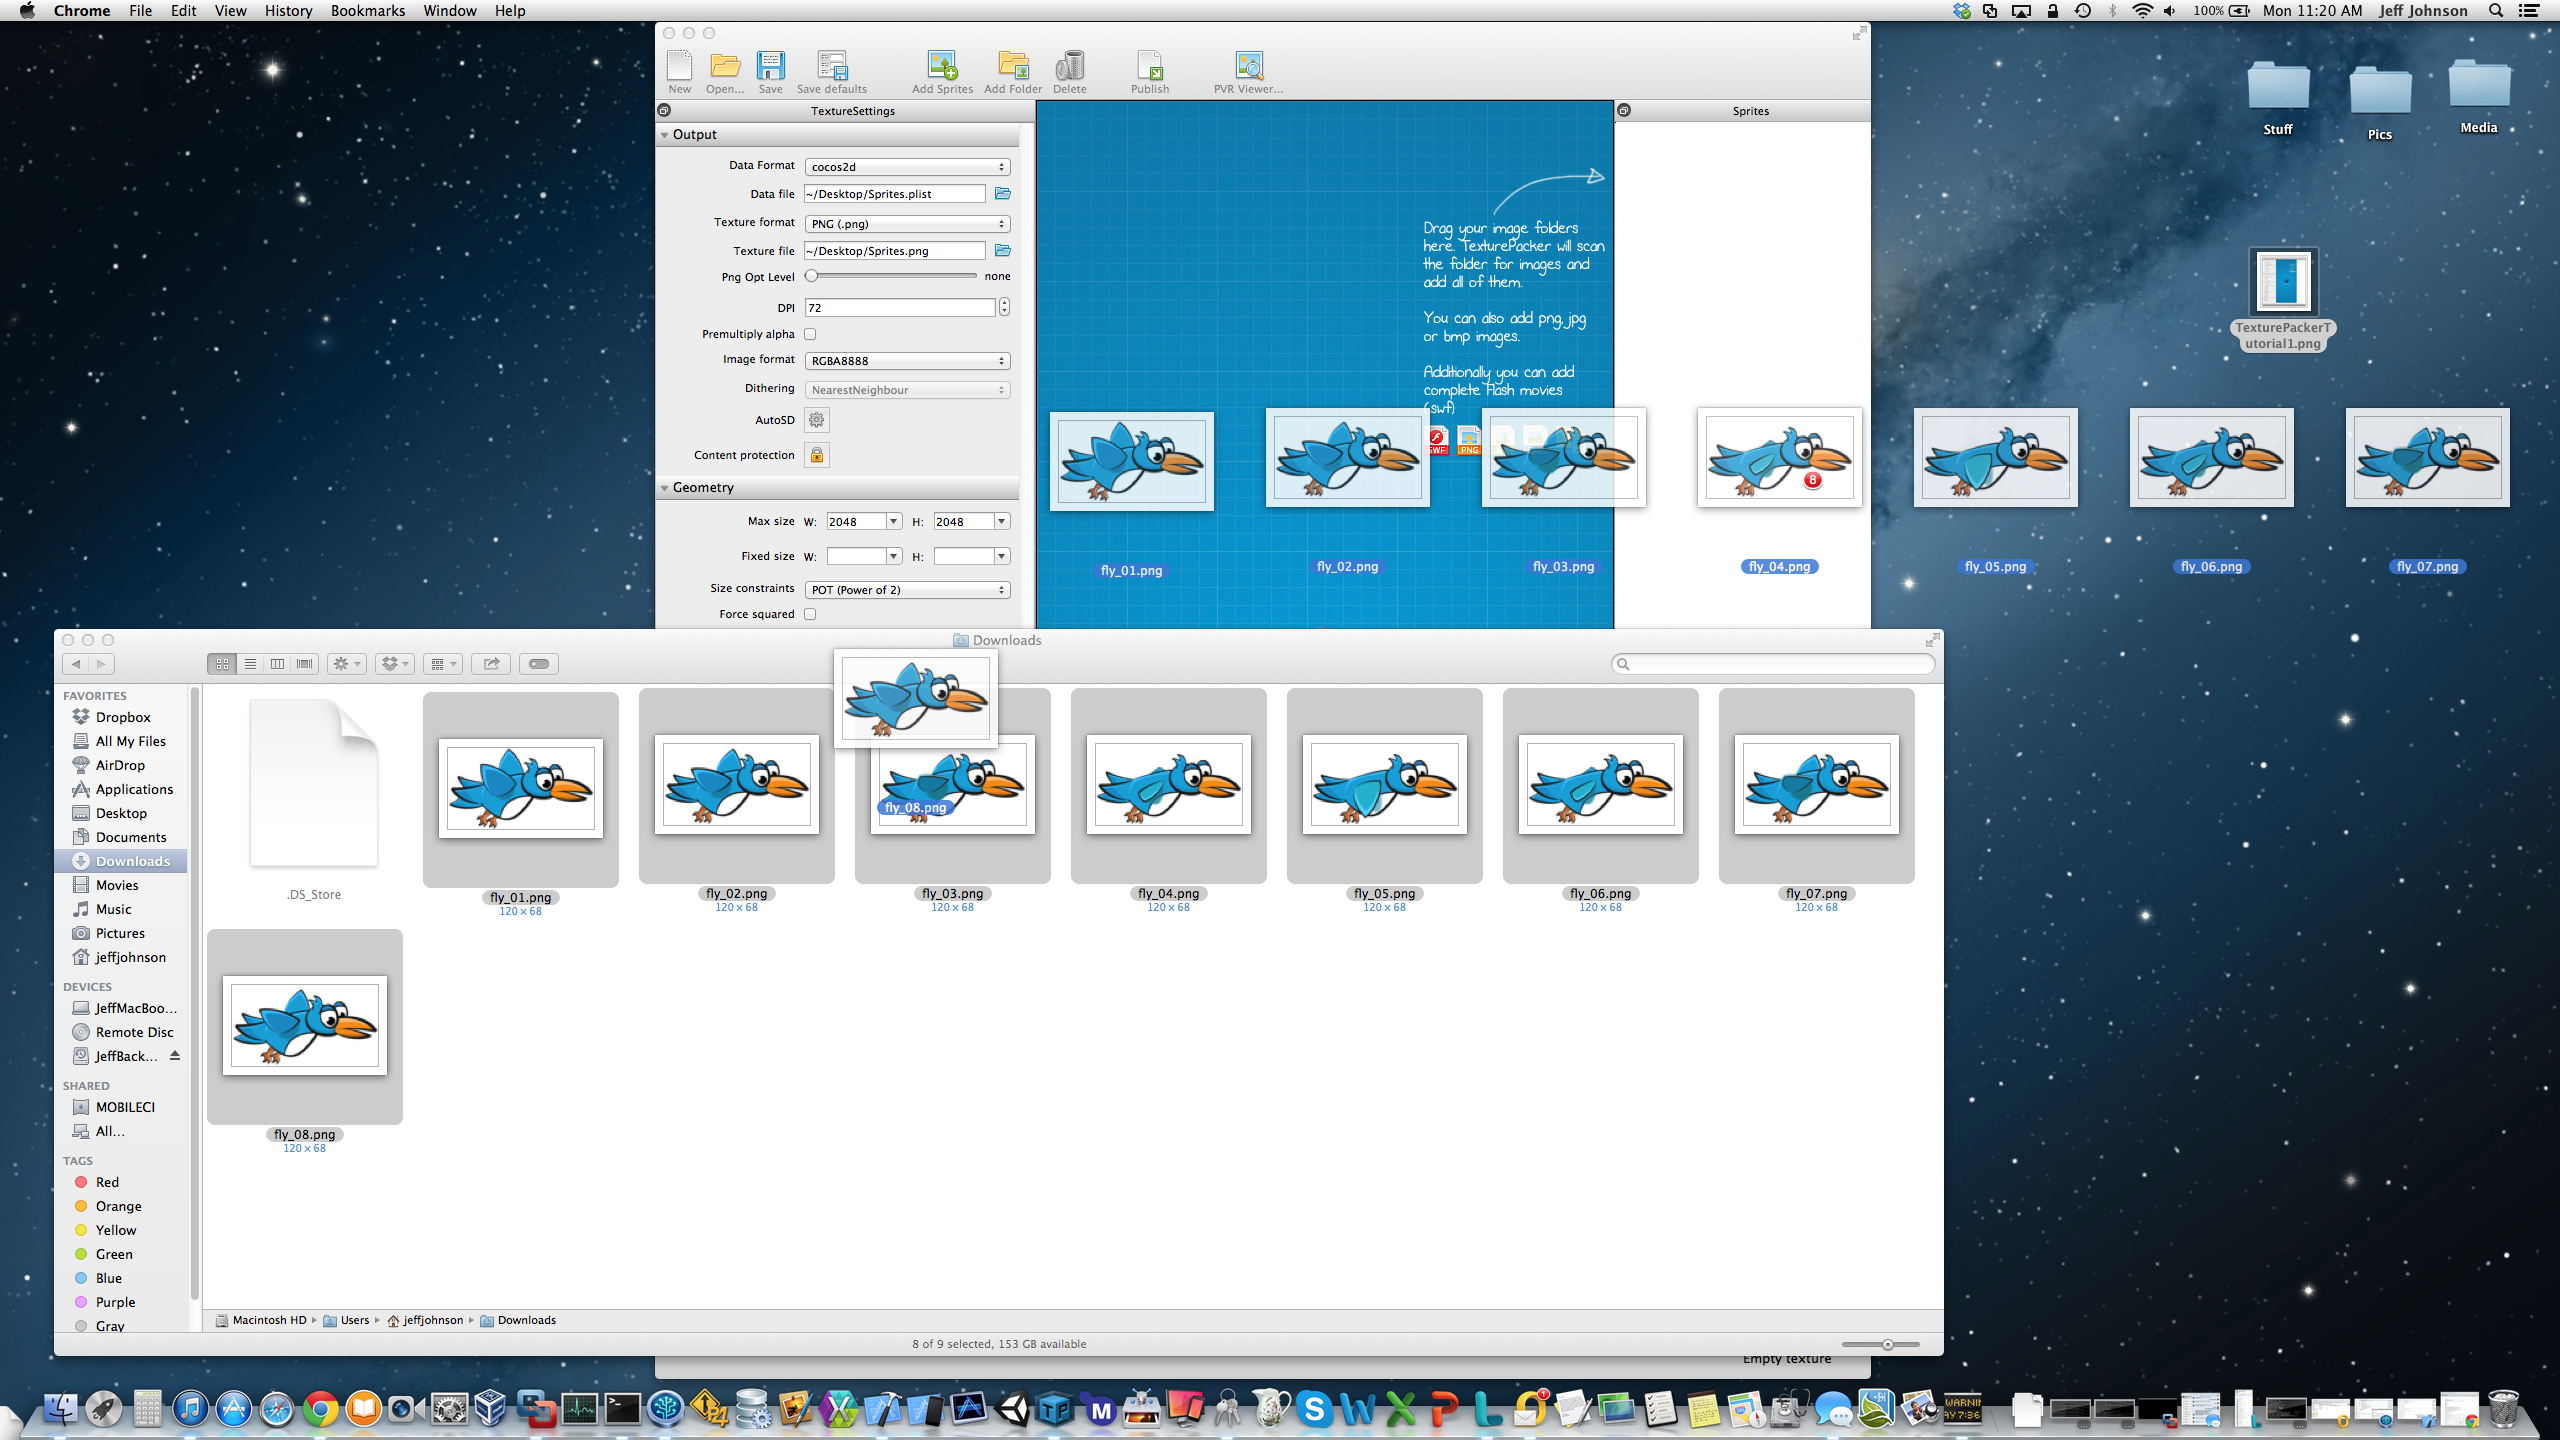
Step #2- Open finder and drag your sprites onto the right side of Texture Packer
Step #3- (Optional) Turn off rotation, trim, etc. if your framework doesn’t support it
Step #4- Click save and then click publish!
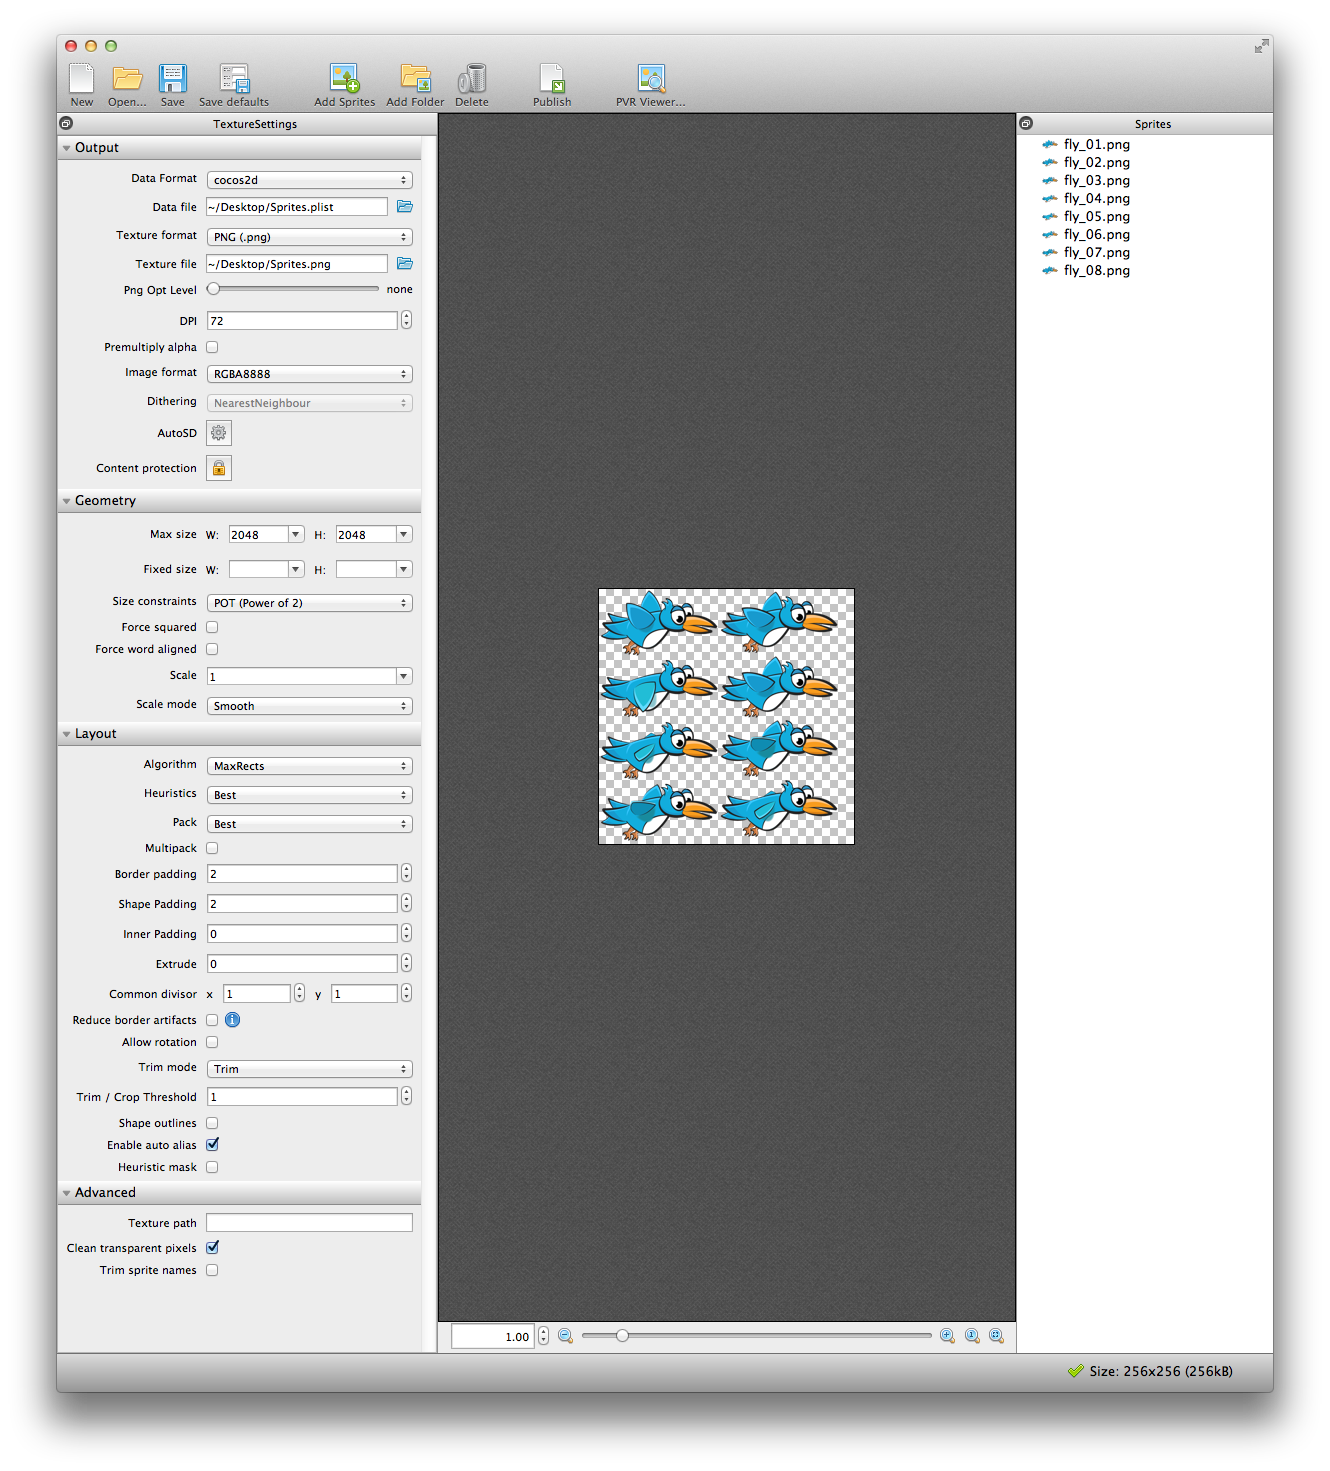
Step #5- Drag the plist and image into your game and write code to load them.
For Cocos2d, it’s
[[CCSpriteFrameCache sharedSpriteFrameCache] addSpriteFramesWithFile:plistFile];
What are you waiting for? Try Texture Packer now!
 Jeff Johnson (